Tuesday, August 18, 2015

Rust and Damage Repair: Part 2

          I guess I will be posting updates pretty frequently with the extended time frame I have for rust removal before parts come in the mail to really get things moving. Since yesterday, I have not done much, but continue to remove the rust from the driver side rear quarter panel. I found out that this side of the car had to be fixed sometime by the previous owner and I will fix it again.

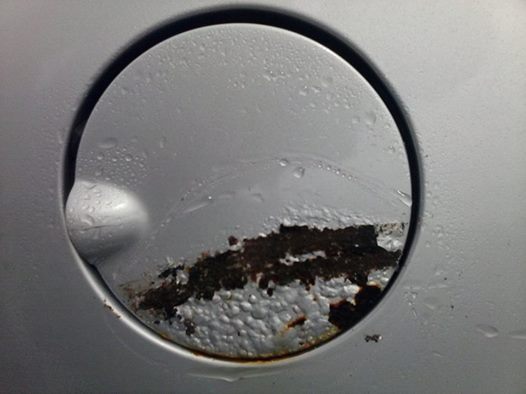
          I also started to clean up the gas cover, and have to replace the gas cap. More will be covered later.

The tools I used to do this work were a screw driver, a blunt pair of pliers (for hitting), and a box to collect falling debris, and a spray bottle of water to keep dust and particles down.


Side


Tailgate


Gas cover


Saturday, August 15, 2015

Rust and Damage Repair Part:1


Looking at what I did today, this is going to have to be a multiple installment post of the rust removal and body reconditioning to this Saab, as it can't be seen to well with the picture above, I dug my way in deep with the rear corner panel as to find its not what its lead to believe.

Seen here, the rust doesn't look to bad, if this was metal, but poking a screw driver into the hole, I see this is not metal, but filler, bondo, something happened here that I am going to have to look into that was covered up, until the rust ate through the filler, and was exposed for me to find how bad it looks underneath.


Its not oozing, I was spraying it all down with water to keep dust down and pieces from flying around in the air.


Under the panel is a piece of metal, that is easy to wiggle up and down.


Everything falling out


Shoveled up off the ground.


I did not even get to the hatchback as it looks pretty bad, but at least its just metal, simply remove the infected area, and work from there. The body panel that I looked into today is a long term investigation and will check back soon with more results.


Headlights and Turn Signals Assembly and Installation


One of the most important parts of your car is your sight, having clean and bright headlights. These allow your car to see what you otherwise can't, so the better they work, the better a drivers overall safety is. This is the first major change to the outside of the car that I have done so far, I took out tall the lights in the front and restored them to like new, the tail lights will come in a later post.

Here is the car after I removed the glass off the headlights and the side light assembly.


Top of headlight before glass is unclipped.


The screws that keep everything together are hex heads.


Left side


Letting it hang out.


Inside assembly.


The wires are taped together, but the tape seen below is old, brittle, and falling off, so I removed it and re-wrapped the wires with electrical tape.


Tape process


Here is the assembly of the glass covers, its not a difficult process, I took the gaskets off the glass where the glass meets the lip of the light cover. I washed everything with a sponge and dish soap. I wiped the glass dry, and let the rubber gasket air dry. I then caulked the edge of the glass where the "like-new" gaskets will be reinstalled. I laid the rubber gasket onto the caulk bead and press evenly around to make sure it was secure. I wiped the outside edge and let everything dry.


I also washed the clips. These hold the glass cover to the entire headlight housing. 6 to each light, there are only 11 here, so one light has 5.


Like new and ready to be put back on.


Light bulbs had to be replaced as needed.


Thursday, August 13, 2015

Rear Passenger Door Window Repair

3 of the 4 power windows go down except the rear passenger door, there was wood shims in place when I bought it, but if fell out and the window fell down, I pulled the window back up and taped it around the sill.


Unscrew from the bottom, with a hex screwdriver.


Door handle with screw plug in place.


Door handle with screw plug popped out.


Had to take door handle apart to get to another two screws.


Corner bezel.


Got the door panel off, and there are two layers of protectant foam and plastic.


This is rediculous, the previous owner put this much wood and plastic shims to hold the window in place, and telling by how many are here, it di not work out for him.


Looking toward the bottom of the door, with the motor in view.


Window motor?


Assembly process.